You can make your Windows your SMTP host to help your programs send out mail. Setting up SMTP is relatively simple, just go to the Add/Remove Windows Components in the Add/Remove Programs in the Control Panel and add it as you do with IIS.
Once completed, it will use the companies default gateway which is determined by the MBX entries in your companies DNS. However, that may not be the closes internet gateway for your company (if your company has multiple gateway) and more likely that is also the busiest gateway.
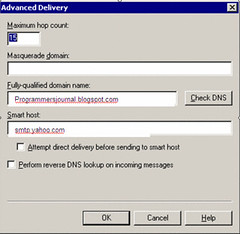
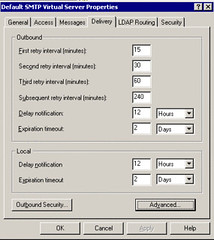
To overcome this, you can specify the smarthost in the SMTP configuration to tell the server to direct the mails it routes to an alternate gateway. To do that right click on the Default SMTP Virtual Server and Select Properties. You will then see the following:
Click on Advanced, then enter your gateway host address as well as your own domain. In this example, I use Programmersjournal.blogspot.com as my domain name and smtp.yahoo.com as the gateway. Both are pseudonyms meant for illustration only.
Thursday, July 31, 2008
Sunday, July 27, 2008
Using User Control to Ease Menu creation
When we are generating multiple reports in a production environment chances are the options we provide for filtering data will be identical across multiple projects. ASP.Net makes it easy for us to generate drop down menus etc but we can make it even easier by creating a UserControl to help with this:
The following is an example how to do it.
In this example, I only provide two menu options (add options as the situation requires):
Start with a ascx file as follows:
Then the code behind maybe something like this:
The table structure of the system_lookup is as follows:
The build file will look like this:
You can then use it in your aspx pages as follows (where dbConn represents the ConnectionString from the project - provides more flexibility instead of hardcoding it to the usercontrol):
The following is an example how to do it.
In this example, I only provide two menu options (add options as the situation requires):
- LOTSTAT (status of the lots your process in your production - Active, Hold, Finished, Terminated etc).
- OWN (owner of the lot - whether production, R&D etc)
- ListBox (allows selection of multiple values)
- DropDownList (allows for only selecting one value).
Start with a ascx file as follows:
<%@ Control Language="VB" AutoEventWireup="false" CodeBehind="ucMenu.ascx.vb" Inherits="PrgLib.UserControl.ucMenu" %>
<asp:DropDownList ID="dlCtrl" runat="server">
</asp:DropDownList><asp:ListBox ID="lbCtrl" runat="server" SelectionMode="Multiple" Rows="5"></asp:ListBox>
<asp:Label ID="lblMsg" runat="server" />
Then the code behind maybe something like this:
In the above example, I created a table called System_Lookup to store all the menu values. Although the example used here is an Oracle Table, you can customize it to use any other database. Populate the menu options into the table. Add columns as the situation requires.
' User Control for Report Filtering
' Author Strovek
' Date Sep 01, 2006
' Revised
'
' A usercontrol that can be shared by multiple reports to facilitate the use of a
' common cache (information is stored in system_lookup table)
' ==========================================================================
Imports Microsoft.VisualBasic
Imports System
Imports System.Data
Imports System.Data.OleDb
Imports System.Reflection
Imports System.Collections
Imports System.Web
<Assembly: AssemblyVersionAttribute("1.00.0")>
<Assembly: AssemblyCompanyAttribute("Programmer's Journal")>
<Assembly: AssemblyProductAttribute("Report Filter User Control")>
<Assembly: AssemblyFileVersion("1.0.0")>
Namespace PrgLib.UserControl
Public Class ucMenu
Inherits System.Web.UI.UserControl
#Region "Variables"
Protected WithEvents lbCtrl As System.Web.UI.WebControls.ListBox
Protected WithEvents dlCtrl As System.Web.UI.WebControls.DropDownList
Protected WithEvents lblmsg As System.Web.UI.WebControls.Label
Dim vDataTypeOpt As String = "OWN"
Dim vSelOpt As String = "DL"
Dim vDateTypeLim As String = "N"
Dim vConnStrKey As String = Nothing
Dim vConnStr As String = Nothing
Dim vCache As System.Web.Caching.Cache
Dim ds As New DataSet
Dim dTab As New DataTable("MenuTab")
Dim Conn As New OleDbConnection
Const dataOptList As String = "OWN,LOTSTAT"
Const selOptList As String = "DL,LB" 'Drop Downlist or ListBox
Const cacheName As String = "ucMenuCache"
#End Region
#Region "Public Properties"
'Property for setting data type
Public Property dataTypeOpt() As String
Get
Return vdataTypeOpt
End Get
Set(ByVal value As String)
If dataOptList.IndexOf(UCase(value)) > -1 Then
vDataTypeOpt = UCase(value)
End If
End Set
End Property
'To decide if to use Dropdownlist or ListBox
Public Property selOpt() As String
Get
Return vSelOpt
End Get
Set(ByVal value As String)
If selOptList.IndexOf(UCase(value)) > -1 Then
vSelOpt = UCase(value)
End If
End Set
End Property
' Sets the Connection string to Connect to database
' Need to be done otherwise the user control will not work
Public Property ConnStrKey() As String
Get
Return vConnStrKey
End Get
Set(ByVal value As String)
vConnStrKey = value
End Set
End Property
Public Property selectedVal() As String
Get
Dim vVal As String = ""
Dim vTmpStr As String
Dim sb As New System.Text.StringBuilder
Dim vArrList As New ArrayList
If vSelOpt = "DL" Then
vVal = dlCtrl.SelectedValue
Else
For Each vTmpStr In lbCtrl.SelectedValue
If sb.Length > 0 Then
sb.Append(",")
End If
sb.Append(vTmpStr)
Next
vVal = sb.ToString
End If
Return vVal
End Get
Set(ByVal value As String)
If vSelOpt = "DL" Then
dlCtrl.SelectedValue = value
Else
Dim vStr As String
Dim vItem As System.Web.UI.WebControls.ListItem
Dim vArrayList As New ArrayList
For Each vStr In Split(value, ",", -1, CompareMethod.Text)
vArrayList.Add(vStr)
Next
For Each vItem In lbCtrl.Items
If vArrayList.Contains(vItem.Value) Then
vItem.Selected = True
Else
vItem.Selected = False
End If
Next
End If
End Set
End Property
#End Region
Private Sub Page_Load(ByVal sender As Object, ByVal e As System.EventArgs) Handles MyBase.Load
Try
If IsPostBack = False Then
fillDS()
If vSelOpt = "DL" Then
lbCtrl.Visible = False
dlCtrl.Visible = True
Else
lbCtrl.Visible = True
dlCtrl.Visible = False
End If
bindCtrl()
End If
Catch ex As Exception
Throw New Exception("[ucFWRptFilter01]" & ex.Message)
End Try
End Sub
Private Sub bindCtrl()
Dim dView As New DataView
Select Case vDataTypeOpt
Case "OWN"
dView = New DataView(dTab, "Type = 'OWNCAT'", "minval", DataViewRowState.CurrentRows)
Case "LOTSTAT"
dView = New DataView(dTab, "Type = 'LOTSTATCAT'", "minval", DataViewRowState.CurrentRows)
End Select
doBindCtrl(dView, "opt")
End Sub
' Helper routine which decides which control to bind
Private Sub doBindCtrl(ByVal dView As DataView, ByVal colName As String)
If vSelOpt = "DL" Then
dlCtrl.DataSource = dView
dlCtrl.DataTextField = colName
dlCtrl.DataBind()
Else
lbCtrl.DataSource = dView
lbCtrl.DataTextField = colName
lbCtrl.DataBind()
End If
End Sub
' Fill the dataSet or get from cache
Public Sub fillDS()
Dim sql, preSQL, postSQL As String
Dim dbCmd As OleDbCommand
Dim dbAdapt As New OleDbDataAdapter
Dim cCache As New System.Web.Caching.Cache
Try
If IsNothing(vConnStrKey) Then
Throw New Exception("[fillDS01]Connection String not set")
Trace.Write("debug", "No connection string")
Else
Trace.Write("debug", "Conn string is set")
vConnStr = System.Configuration.ConfigurationSettings.AppSettings(vConnStrKey)
vCache = Page.Cache
If IsNothing(vCache.Get(cacheName)) Then
Conn = New OleDbConnection(vConnStr)
Conn.Open()
dbCmd = Conn.CreateCommand
sql = "select opt, type, minval, lookupkey from system_lookup where systemid = 'MENU' order by type, minval"
dbCmd.CommandText = sql
dbAdapt.SelectCommand = dbCmd
dbAdapt.Fill(dTab)
dbCmd.Dispose()
Conn.Close()
vCache.Add(cacheName, dTab, Nothing, _
DateTime.Now.AddSeconds(3600), TimeSpan.Zero, _
System.Web.Caching.CacheItemPriority.Normal, Nothing)
Else
dTab = vCache.Get(cacheName)
End If
End If
Catch ex As Exception
If Conn.State = ConnectionState.Open Then
Conn.Close()
End If
Throw New Exception("[fillDS02]" & ex.Message)
Finally
If Conn.State = ConnectionState.Open Then
Conn.Close()
End If
End Try
End Sub
End Class
End Namespace
The table structure of the system_lookup is as follows:
SYSTEMID VARCHAR2(20 BYTE)You can then use NANT to compile to above code into an independent .dll file and copy it together with the .ascx file to your various projects.
TYPE VARCHAR2(40 BYTE)
OPT VARCHAR2(40 BYTE)
ENTITLEMENT NUMBER
UPDTIME DATE
MODIFIER_ID VARCHAR2(10 BYTE)
MINVAL NUMBER
LOOKUPKEY VARCHAR2(60)
The build file will look like this:
<?xml version="1.0"?>
<project name="ucMenu" default="build" basedir=".">
<property name="project.name" value="User Control for Menu Options"/>
<property name="project.version" value="1.0.0"/>
<description>The ucMenu build files.</description>
<property name="debug" value="true" unless="${property::exists('debug')}" />
<property name="verbose" value="true" />
<target name="clean" description="remove all generated files">
<delete file="bin\ucMenu.dll" failonerror="false" />
<delete file="bin\ucMenu.pdb" failonerror="false" />
</target>
<target name="build" description="compiles the source code">
<vbc target="library" output="bin\ucMenu.dll" debug="${debug}">
<sources>
<include name="UserControl\ucMenu.ascx.vb" />
</sources>
<references>
<include name="System.dll" />
<include name="System.Web.dll" />
<include name="System.Web.RegularExpressions.dll" />
<include name="System.XML.dll" />
<include name="System.Web.Services.dll" />
<include name="System.Data.dll" />
</references>
</vbc>
</target>
</project>
You can then use it in your aspx pages as follows (where dbConn represents the ConnectionString from the project - provides more flexibility instead of hardcoding it to the usercontrol):
Additional Notes:
<%@ Register Src="UserControl/ucMenu.ascx" TagName="ucMenu" TagPrefix="uc1" %>
<uc1:ucMenu id="UcMenu_Own" dataTypeOpt="OWN" ConnStrKey="dbConn" selopt="LB" runat="server"></uc1:ucMenu>
- When ListBox option is used, the selectedVal property will return the values in comma delimited list. This is done to ease setting and retrieving selected value.
- Cache is used to improve performance
Tuesday, July 22, 2008
Automatic Oracle Transaction in ASP.Net
In the previous article I covered how to manually create transaction to ensure all the transaction are either committed or rolledback. In this article, I will share how to do this automatically:
Automatic Transaction
To use automatic transaction in ASP.Net, add the page directive Transaction="Required" .
<%@ Page Transaction="Required" %>
With the above directive, all database connection will automatically have transaction enabled. However, some additional preparations are needed for this to work.
If you are using OracleClient data provider, "Oracle Services for Microsoft Transaction Server" which comes with the Oracle client installation CD will need to be installed. Otherwise, you will encounter error - finding oramts.dll.
If you are using OleDB data provider with Oracle, XACT_E_TMNOTAVAILABLE(0x8004D01B). This can only be fixed by running the webform that has privilege to HKLM\SOFTWARE\Microsoft\MSDTC\MTxOCI and also full access to the directory where Oracle client is installed. However, this is not recommended since it may lead to security hole for hackers.
You can then control whether the transactions in your page is committed or rolled back using the following command:
System.EnterpriseServices.ContextUtil.SetAbort() to rollback.
System.EnterpriseServices.ContextUtil.SetComplete() to commit.
You could also use System.EnterpriseServices.ContextUtil.Autocomplete but only on classes that is derived System.EnterpriseServices.ServicedComponent.
The following is a sample using the above concept:
ASPx page:
As can be seen above the page directive includes the statement Transaction="Required".
The code behind is as follows (the following codes work in Framework 1.1 and 2.0):
The translib code is as follows:
In the above example, a simple class is called that called tranLib. The class has two methods, one to set the database connection and another to perform an insert record. As shown in the above, the transaction is automatically performed.
Pro
Support transaction across multiple database connections.
Do not have to assign the transaction object to every database command created.
Con
Requires additional components.
If using OleDb, require additional access rights.
Automatic Transaction
To use automatic transaction in ASP.Net, add the page directive Transaction="Required" .
<%@ Page Transaction="Required" %>
With the above directive, all database connection will automatically have transaction enabled. However, some additional preparations are needed for this to work.
If you are using OracleClient data provider, "Oracle Services for Microsoft Transaction Server" which comes with the Oracle client installation CD will need to be installed. Otherwise, you will encounter error - finding oramts.dll.
If you are using OleDB data provider with Oracle, XACT_E_TMNOTAVAILABLE(0x8004D01B). This can only be fixed by running the webform that has privilege to HKLM\SOFTWARE\Microsoft\MSDTC\MTxOCI and also full access to the directory where Oracle client is installed. However, this is not recommended since it may lead to security hole for hackers.
You can then control whether the transactions in your page is committed or rolled back using the following command:
System.EnterpriseServices.ContextUtil.SetAbort() to rollback.
System.EnterpriseServices.ContextUtil.SetComplete() to commit.
You could also use System.EnterpriseServices.ContextUtil.Autocomplete but only on classes that is derived System.EnterpriseServices.ServicedComponent.
The following is a sample using the above concept:
ASPx page:
<%@ Page Language="vb" AutoEventWireup="false" Codebehind="TransPage.aspx.vb" Inherits="testTrans.WebForm1" Transaction="Required"%>
<!DOCTYPE HTML PUBLIC "-//W3C//DTD HTML 4.0 Transitional//EN">
<HTML>
<HEAD>
<title>Transaction Page</title>
<meta content="Microsoft Visual Studio .NET 7.1" name="GENERATOR">
<meta content="Visual Basic .NET 7.1" name="CODE_LANGUAGE">
<meta content="JavaScript" name="vs_defaultClientScript">
<meta content="http://schemas.microsoft.com/intellisense/ie5" name="vs_targetSchema">
</HEAD>
<body>
<form id="Form1" method="post" runat="server">
<asp:Label id="lblMsg" runat="server"></asp:Label>
<br>
<asp:Label id="lblErrMsg" runat="server" ForeColor="Red"></asp:Label>
<br>
<TABLE id="Table1" cellSpacing="1" cellPadding="1" width="300" border="1">
<TR>
<TD style="WIDTH: 115px">Name</TD>
<TD>
<asp:TextBox id="txtName" runat="server"></asp:TextBox></TD>
</TR>
<TR>
<TD style="WIDTH: 115px">Dept</TD>
<TD>
<asp:TextBox id="txtDept" runat="server"></asp:TextBox></TD>
</TR>
<TR>
<TD style="WIDTH: 115px"></TD>
<TD>
<asp:CheckBox id="cbFail" runat="server" Text="Fail Transaction"></asp:CheckBox></TD>
</TR>
<TR>
<TD style="WIDTH: 115px" vAlign="middle" height="40">
<asp:Button id="Button1" runat="server" Text="Submit"></asp:Button></TD>
<TD height="40"></TD>
</TR>
</TABLE>
</form>
</body>
</HTML>
As can be seen above the page directive includes the statement Transaction="Required".
The code behind is as follows (the following codes work in Framework 1.1 and 2.0):
' Transaction page. Uses automatic transaction, uses OracleClient.
' Author Strovek
' Date Feb 15, 2006
' Revised
Imports System.Data.OracleClient
Imports TranLib
'Imports System.Data.OleDb
Public Class WebForm1
Inherits System.Web.UI.Page
#Region " Web Form Designer Generated Code "
'This call is required by the Web Form Designer.
<System.Diagnostics.DebuggerStepThrough()> Private Sub InitializeComponent()
End Sub
Protected WithEvents txtName As System.Web.UI.WebControls.TextBox
Protected WithEvents txtDept As System.Web.UI.WebControls.TextBox
Protected WithEvents Button1 As System.Web.UI.WebControls.Button
Protected WithEvents lblMsg As System.Web.UI.WebControls.Label
Protected WithEvents lblErrMsg As System.Web.UI.WebControls.Label
Protected WithEvents cbFail As System.Web.UI.WebControls.CheckBox
'NOTE: The following placeholder declaration is required by the Web Form Designer.
'Do not delete or move it.
Private designerPlaceholderDeclaration As System.Object
Private Sub Page_Init(ByVal sender As System.Object, ByVal e As System.EventArgs) _
Handles MyBase.Init
'CODEGEN: This method call is required by the Web Form Designer
'Do not modify it using the code editor.
InitializeComponent()
End Sub
#End Region
Dim Conn As New _
OracleConnection(System.Configuration.ConfigurationSettings.AppSettings("OrclConn"))
'Dim Conn As New _
'OleDbConnection(System.Configuration.ConfigurationSettings.AppSettings("OrclConn"))
Private Sub Page_Load(ByVal sender As System.Object, _
ByVal e As System.EventArgs) Handles MyBase.Load
'Put user code to initialize the page here
End Sub
Private Sub Button1_Click(ByVal sender As System.Object, _
ByVal e As System.EventArgs) Handles Button1.Click
lblMsg.Text = ""
lblErrMsg.Text = ""
Try
Conn.Open()
Dim dbCmd As OracleCommand = Conn.CreateCommand
'Dim dbCmd As OleDbCommand = Conn.CreateCommand
dbCmd.CommandText = "insert into id_lookup (name, deptid) values ('" _
& txtName.Text & "','" & txtDept.Text & "')"
dbCmd.ExecuteNonQuery()
lblMsg.Text += "<br>Connection Opened"
Dim tLib As New TranLib.TranLib
tLib.setConn(Conn)
tLib.addRec(txtName.Text & "_1", txtDept.Text)
If cbFail.Checked Then
System.EnterpriseServices.ContextUtil.SetAbort()
lblMsg.Text += "<br>Transaction aborted"
Else
System.EnterpriseServices.ContextUtil.SetComplete()
lblMsg.Text += "<br>Transaction Completed"
End If
Catch ex As Exception
System.EnterpriseServices.ContextUtil.SetAbort()
lblErrMsg.Text += "<br>Error occurred " & ex.Message
Finally
If conn.State = ConnectionState.Open Then
conn.Close()
End If
End Try
End Sub
End Class
The translib code is as follows:
' Test library to see if the automatic transaction can work with an unsigned dll
' Author Strovek
' Date Feb 17, 2006
' Revised
' ======================================================================
Imports System.Data.OracleClient
Public Class TranLib
Dim Conn As OracleConnection
Public Sub setConn(ByRef dbConn As OracleConnection)
Conn = dbConn
End Sub
Public Sub addRec(ByRef pName As String, ByRef pDeptid As String)
Try
Dim dbCmd As OracleCommand = Conn.CreateCommand
dbCmd.CommandText = "insert into id_lookup (name, deptid) values ('" _
& pName & "','" & pDeptid & "')"
dbCmd.ExecuteNonQuery()
Catch ex As Exception
Throw New Exception("[TranLib.addRec01]" & ex.Message)
End Try
End Sub
End Class
In the above example, a simple class is called that called tranLib. The class has two methods, one to set the database connection and another to perform an insert record. As shown in the above, the transaction is automatically performed.
Pro
Support transaction across multiple database connections.
Do not have to assign the transaction object to every database command created.
Con
Requires additional components.
If using OleDb, require additional access rights.
Monday, July 21, 2008
Manually Setting Transaction in ASP.Net
Transactions ensures the integrity of the data by making sure that either all the database occur or none of them do as in updating an account balance and inserting a account history.
To manually set transaction, use BeginTransaction on the database connection to create the Transaction Object. However, it is important to note that when using this approach, the transaction only applies to the connection. If you have more than one database connection opened, the transaction only works within the connection where the transaction was started.
Also, all database command that is created from the connection that has started the transaction need to be assigned the transaction otherwise an error will be triggered. If you want to update multiple databases, it needs to be done using dblink (for Oracle) since the transaction is isolated to the single database connection.
The following is a sample code:
ASPX:
Code behind file (the following code works in Framework 1.1 and 2.0):
As can be seen in the above sample, create an OracleTransaction Object using the BeginTransaction method in the connection. This object will need to be assigned to the properties of any subsequent OracleCommand created. Consequently, we will not be able to use the Tranlib library in the first sample without modification.
The same approach can be used with OleDB data provider by changing all the OracleClient object to the OleDB counterparts (OracleConnection with OleDBConnection, OracleCommand with OleDBCommand and OracleTransaction with OleDBTransaction).
The commit and rollback uses the commit and rollback method of the transaction object.
Pro
No additional components are needed.
Con
Need to assign the transaction object to all objects derived from the database connection which has a transaction started.
Transaction isolated within one database connection.
To manually set transaction, use BeginTransaction on the database connection to create the Transaction Object. However, it is important to note that when using this approach, the transaction only applies to the connection. If you have more than one database connection opened, the transaction only works within the connection where the transaction was started.
Also, all database command that is created from the connection that has started the transaction need to be assigned the transaction otherwise an error will be triggered. If you want to update multiple databases, it needs to be done using dblink (for Oracle) since the transaction is isolated to the single database connection.
The following is a sample code:
ASPX:
<%@ Page Language="vb" AutoEventWireup="false" Codebehind="transPage2.aspx.vb" Inherits="testTrans.transPage2"%>
<!DOCTYPE HTML PUBLIC "-//W3C//DTD HTML 4.0 Transitional//EN">
<HTML>
<HEAD>
<title>Transaction Page</title>
<meta content="Microsoft Visual Studio .NET 7.1" name="GENERATOR">
<meta content="Visual Basic .NET 7.1" name="CODE_LANGUAGE">
<meta content="JavaScript" name="vs_defaultClientScript">
<meta content="http://schemas.microsoft.com/intellisense/ie5" name="vs_targetSchema">
</HEAD>
<body>
<form id="Form1" method="post" runat="server">
<asp:Label id="lblMsg" runat="server"></asp:Label>
<br>
<asp:Label id="lblErrMsg" runat="server" ForeColor="Red"></asp:Label>
<br>
<TABLE id="Table1" cellSpacing="1" cellPadding="1" width="300" border="1">
<TR>
<TD style="WIDTH: 115px">Name</TD>
<TD>
<asp:TextBox id="txtName" runat="server"></asp:TextBox></TD>
</TR>
<TR>
<TD style="WIDTH: 115px">Dept</TD>
<TD>
<asp:TextBox id="txtDept" runat="server"></asp:TextBox></TD>
</TR>
<TR>
<TD style="WIDTH: 115px"></TD>
<TD>
<asp:CheckBox id="cbFail" runat="server" Text="Fail Transaction"></asp:CheckBox></TD>
</TR>
<TR>
<TD style="WIDTH: 115px" vAlign="middle" height="40">
<asp:Button id="Button1" runat="server" Text="Submit"></asp:Button></TD>
<TD height="40"></TD>
</TR>
</TABLE>
</form>
</body>
</HTML>
Code behind file (the following code works in Framework 1.1 and 2.0):
' Transaction Page - uses manual transaction at the Oracle connection level
' Author Strovek
' Date Feb 16, 2006
' Revised
Imports System.Data.OracleClient
Imports TranLib
Public Class transPage2
Inherits System.Web.UI.Page
#Region " Web Form Designer Generated Code "
'This call is required by the Web Form Designer.
<System.Diagnostics.DebuggerStepThrough()> Private Sub InitializeComponent()
End Sub
Protected WithEvents lblMsg As System.Web.UI.WebControls.Label
Protected WithEvents lblErrMsg As System.Web.UI.WebControls.Label
Protected WithEvents txtName As System.Web.UI.WebControls.TextBox
Protected WithEvents txtDept As System.Web.UI.WebControls.TextBox
Protected WithEvents cbFail As System.Web.UI.WebControls.CheckBox
Protected WithEvents Button1 As System.Web.UI.WebControls.Button
'NOTE: The following placeholder declaration is required by the Web Form Designer.
'Do not delete or move it.
Private designerPlaceholderDeclaration As System.Object
Private Sub Page_Init(ByVal sender As System.Object, ByVal e As System.EventArgs) _
Handles MyBase.Init
'CODEGEN: This method call is required by the Web Form Designer
'Do not modify it using the code editor.
InitializeComponent()
End Sub
#End Region
Dim Conn As New _
OracleConnection(System.Configuration.ConfigurationSettings.AppSettings("OrclConn"))
Dim dbTrans As OracleTransaction
Private Sub Page_Load(ByVal sender As System.Object, ByVal e As System.EventArgs) _
Handles MyBase.Load
'Put user code to initialize the page here
End Sub
Private Sub Button1_Click(ByVal sender As System.Object, ByVal e As System.EventArgs) _
Handles Button1.Click
lblMsg.Text = ""
lblErrMsg.Text = ""
Try
Conn.Open()
dbTrans = Conn.BeginTransaction
lblMsg.Text += "<br>Connection Opened"
Dim dbCmd As OracleCommand = Conn.CreateCommand
dbCmd.Transaction = dbTrans
dbCmd.CommandText = "insert into id_lookup (name, deptid) values ('" _
& txtName.Text & "','" & txtDept.Text & "')"
dbCmd.ExecuteNonQuery()
If cbFail.Checked Then
dbTrans.Rollback()
lblMsg.Text += "<br>Transaction aborted"
Else
dbTrans.Commit()
lblMsg.Text += "<br>Transaction Completed"
End If
Catch ex As Exception
dbTrans.Rollback()
lblErrMsg.Text += "<br>Error occurred " & ex.Message
Finally
If Conn.State = ConnectionState.Open Then
Conn.Close()
End If
End Try
End Sub
End Class
As can be seen in the above sample, create an OracleTransaction Object using the BeginTransaction method in the connection. This object will need to be assigned to the properties of any subsequent OracleCommand created. Consequently, we will not be able to use the Tranlib library in the first sample without modification.
The same approach can be used with OleDB data provider by changing all the OracleClient object to the OleDB counterparts (OracleConnection with OleDBConnection, OracleCommand with OleDBCommand and OracleTransaction with OleDBTransaction).
The commit and rollback uses the commit and rollback method of the transaction object.
Pro
No additional components are needed.
Con
Need to assign the transaction object to all objects derived from the database connection which has a transaction started.
Transaction isolated within one database connection.
Saturday, July 19, 2008
Flexible consumption of Webservice
A quick way to consume a web service is to add Web Reference to the project. This works well most of the time.
However, imagine a scenario where you are supporting multiple sites in different countries and assuming that each of these sites are hosting the similar webservice locally. If you were to use web reference then you will need to compile a copy for each of theses sites (after changing the reference).
A much better way is to:
"c:\Program Files\Microsoft Visual Studio .NET 2003\SDK\v1.1\Bin\wsdl.exe" /o:samplews.vb /l:vb /n:MyService http://localhost/sampleSrv/Service1.asmx?wsdl
Depending on which version of VS you have, the wsdl.exe may be in a different folder. For VS 2008, it is in c:\Program Files\Microsoft SDKs\Windows\v6.0A\bin\wsdl.exe
In the above example, my webservice is http://localhost/sampleSrv/Service1.asmx and I created a proxy program in VB (Visual Basic) and saved it in a file samplews.vb. I also indicated that the class be placed with a namespace MyService.
The following is a snippet of the code generated:
Make a copy of the new subroutine and change it as follows:
Either add this new source code to your project or create it as an independent assembly (dll) and reference it.
To use it then, you create:
Dim vSvc as New MyService.Service1(url)
' Where url is a string variable which you get the value from your application config file.
instead of
Dim vSvc As New MyService.Service1()
However, imagine a scenario where you are supporting multiple sites in different countries and assuming that each of these sites are hosting the similar webservice locally. If you were to use web reference then you will need to compile a copy for each of theses sites (after changing the reference).
A much better way is to:
- Create a proxy class using the wsdl.exe tool from Microsoft.
- Copy the constructor from the proxy class and create one that will take the url as a parameter.
- Use this new constructor in the project that needs to consume the webservice and refer to the config file for the url (so you just need to change that value for each site).
"c:\Program Files\Microsoft Visual Studio .NET 2003\SDK\v1.1\Bin\wsdl.exe" /o:samplews.vb /l:vb /n:MyService http://localhost/sampleSrv/Service1.asmx?wsdl
Depending on which version of VS you have, the wsdl.exe may be in a different folder. For VS 2008, it is in c:\Program Files\Microsoft SDKs\Windows\v6.0A\bin\wsdl.exe
In the above example, my webservice is http://localhost/sampleSrv/Service1.asmx and I created a proxy program in VB (Visual Basic) and saved it in a file samplews.vb. I also indicated that the class be placed with a namespace MyService.
The following is a snippet of the code generated:
'------------------------------------------------------------------------------
' <autogenerated>
' This code was generated by a tool.
' Runtime Version: 1.1.4322.2407
'
' Changes to this file may cause incorrect behavior and will be lost if
' the code is regenerated.
' </autogenerated>
'------------------------------------------------------------------------------
Option Strict Off
Option Explicit On
Imports System
Imports System.ComponentModel
Imports System.Diagnostics
Imports System.Web.Services
Imports System.Web.Services.Protocols
Imports System.Xml.Serialization
'
'This source code was auto-generated by wsdl, Version=1.1.4322.2407.
'
Namespace MyService
'<remarks/>
<System.Diagnostics.DebuggerStepThroughAttribute(), _
System.ComponentModel.DesignerCategoryAttribute("code"), _
System.Web.Services.WebServiceBindingAttribute(Name:="WriterServicesSoap", [Namespace]:="http://tempuri.org/")> _
Public Class Service1
Inherits System.Web.Services.Protocols.SoapHttpClientProtocol
'<remarks/>
Public Sub New()
MyBase.New
Me.Url = "http://localhost/sampleSrv/Service1.asmx"
End Sub
Make a copy of the new subroutine and change it as follows:
Public Sub New(byval pUrl As String)
MyBase.New
Me.Url = pUrl
End Sub
Either add this new source code to your project or create it as an independent assembly (dll) and reference it.
To use it then, you create:
Dim vSvc as New MyService.Service1(url)
' Where url is a string variable which you get the value from your application config file.
instead of
Dim vSvc As New MyService.Service1()
Labels:
.Net,
Tips,
vb.net,
web service
Monday, July 14, 2008
Exporting data to Excel Part 3
This is the final part of my series on exporting data to Excel. This approach only works with asp.net while the previous two approaches works in ASP classic.
This approach is render the web control directly to excel:
First thing to do is to override the following verification as follows:
I have left out the aspx codes and the rest of the codes and assume that those portion are already taken care of.
Notice the following:
Links to earlier articles found below:
Part 1
Part 2
This approach is render the web control directly to excel:
First thing to do is to override the following verification as follows:
Next is to render the control as follows:
' required to prevent error of control not running within "form runat=server" tags
Public Overrides Sub VerifyRenderingInServerForm(ByVal control As System.Web.UI.Control)
'###this removes the no forms error by overriding the error
End Sub
'Export the datagrid to excel
Private Sub btnExcel_Click(ByVal sender As Object, ByVal e As System.EventArgs) Handles btnExcel.Click
Response.Clear()
Response.ContentType = "application/vnd.ms-excel"
VerifyRenderingInServerForm(DG_Cycle)
Response.AddHeader("content-disposition", "attachment;filename=Data.xls")
Response.Charset = ""
Me.EnableViewState = False
Dim tw As New System.IO.StringWriter
Dim hw As New System.Web.UI.HtmlTextWriter(tw)
DG_Cycle.RenderControl(hw)
Response.Write(tw.ToString)
Response.End()
End Sub
I have left out the aspx codes and the rest of the codes and assume that those portion are already taken care of.
Notice the following:
- response.clear is done to clear off anything left over in the response buffer.
- We pass in the data grid to VerifyRenderingInServerForm
- A string writer is used to render the control.
- We don't have to bother about hiding any other controls. Only the datagrid will be rendered to Excel.
- Since the datagrid is already bound and contains data, the program need not go back to the database to process the data again.
- This approach only works with asp.net.
- You will not see other information other than the datagrid.
Links to earlier articles found below:
Part 1
Part 2
Sunday, July 13, 2008
Exporting data to Excel Part 2
Another way to export to excel is to changing the content type. This is easily done by using Setting the response.contenttype property as follows:
Response.ContentType = "application/vnd.ms-excel"
Since in asp.net the code behind will execute first before any of the aspx code will execute, the browser will receive this information and launch excel accordingly. However, the file will still show the original asp.net page name. To override that you need to add in the disposition as follows:
Response.AddHeader("content-disposition", "attachment;filename=Data.xls")
This will cause excel to recognize the asp.net page as Data.xls.
Additional things that you should do is if your page include menu controls like dropdownlist, checkbox etc, you may want to enclose them into a panel and set the panel visible properties to false so that it does not get rendered:
This approach is better than the first approach because:
<LINK REL="stylesheet" HREF="stylesheets/pageFormat.css" TYPE="text/css">
Link to Previous article:
Part 1
Response.ContentType = "application/vnd.ms-excel"
Since in asp.net the code behind will execute first before any of the aspx code will execute, the browser will receive this information and launch excel accordingly. However, the file will still show the original asp.net page name. To override that you need to add in the disposition as follows:
Response.AddHeader("content-disposition", "attachment;filename=Data.xls")
This will cause excel to recognize the asp.net page as Data.xls.
Additional things that you should do is if your page include menu controls like dropdownlist, checkbox etc, you may want to enclose them into a panel and set the panel visible properties to false so that it does not get rendered:
<asp:panel id="notInExcel" runat="server">
<asp:DropDownList id="frDy" runat="server" Width="40px"></asp:DropDownList>
<asp:DropDownList id="frMth" runat="server" Width="55px"></asp:DropDownList>
<asp:TextBox id="frYr" runat="server" Width="40px"></asp:TextBox>
</asp:panel>
This approach is better than the first approach because:
- You don't have to loosen the security in your browser.
- It works with almost any browser.
- It will open any program that supports the .xls file include (Open Office). You don't have render your data separately than what you are already doing to display on the screen.
- When the person clicks the first time to display on the screen, and he submits a second time to export to excel, the program need to requery the data.
- If you refer to a css file using relative addressing, it will not carry over to excel so you will lose your formatting and also receive any error indicating that the css file cannot be found.
<LINK REL="stylesheet" HREF="stylesheets/pageFormat.css" TYPE="text/css">
Link to Previous article:
Part 1
Saturday, July 12, 2008
Exporting data to Excel Part 1
There are several ways to export to excel. The most primitive way is to use vbscript to generate call excel and feed excel directly. The example below is done in ASP classic but can be easily converted to ASP.Net.
To begin, create a button and add the event on click to trigger it.
The link can be something like this:
<a href='#' OnClick='GenerateExcel()'>Export to Excel</a>
The GenerateExcel is the vbscript which you can define as follows:
Next is to create a excel object as follows:
This approach has many flaws and such as:
To begin, create a button and add the event on click to trigger it.
The link can be something like this:
<a href='#' OnClick='GenerateExcel()'>Export to Excel</a>
The GenerateExcel is the vbscript which you can define as follows:
<SCRIPT LANGUAGE="VBScript">
Sub GenerateExcel()
On Error Resume Next
...
End Sub
</SCRIPT>
Next is to create a excel object as follows:
Assuming that you are populating from a resultset, you can then start looping through the result set as follows:
Set Excel = CreateObject("Excel.Application")
Set ExcelWBk = Excel.Workbooks.Add
Set ExcelWS = ExcelWBk.Worksheets(1)
Excel.visible = True
ExcelWS.name = "Data"
Some additional that can be done is to check on the number of rows in the Result set before looping.
<%
row = 2
oRs.MoveFirst
' --------------------------
For i = 0 To oRs.Fields.Count - 1 %>
ExcelWS.Cells(1, <% =(i + 1) %>) = "<% =oRs.Fields(i).Name %>"
<% Next
' --------------------------
Do While Not oRs.EOF
For i = 0 To oRs.Fields.Count - 1 %>
' ExcelWS.Cells(1, <% =(i + 1) %>) = "<% =oRs.Fields(i).Name %>"
ExcelWS.Cells(<% =row %>, <% =(i + 1) %>) = "<% =oRs.Fields(i).Value %>"
<% Next
row = row + 1
oRs.MoveNext
Loop
%>
This approach has many flaws and such as:
- It only runs on Windows and in IE with excel installed.
- You need to open up the security in your IE to allow executing of unsigned script (recommended to set it to prompt).
- It will create a huge script on the browser (so will use memory on the client).
- It will generate the script irrespecive if the script is used again.
Saturday, July 5, 2008
Writing AJAX web page using Anthem
When I first started on trying to find a way to do AJAX in asp.net, I searched through the internet to find the various framework. One interesting site that provided me a comparison is here. At that time, Atlas was still in beta. I then started comparing what it would take to implement it. Most of the framework requires many steps.
Finally, I found the easiest one - Anthem. Why I like it? Well, to use it just download the source code, compile it and then use the assembly generated - it comes with VS2003 version and VS2005 version.
When in VS2003, just create a new tab in the Toolbox and then click Add Items.
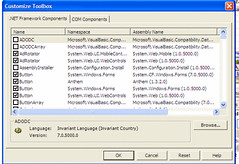
Once you browse and select the anthem.dll, you will get to choose which control to add to the Toolbox:
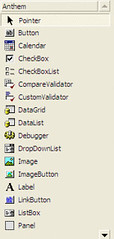
The control list is as follows (see it looks identical to the default controls that comes with the Framework):
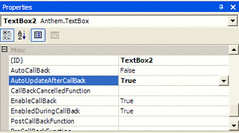
After you have set up the Toolbox, you can drag and drop in to your Webform as you would with a normal webcontrol. All the attributes found in the Webcontrol is also available in the Anthem control. There are some additional attributes such as
Next look at the control comparison:
Anthem Label
<anthem:Label id="antLabel" runat="server" AutoUpdateAfterCallBack="True"></anthem:Label>
Webcontrol Label:
<asp:Label id="lblMsg" runat="server"></asp:Label>
Anthem TextBox:
<anthem:TextBox id="TextBox2" runat="server" AutoUpdateAfterCallBack="True"></anthem:TextBox>
Webcontrol
<asp:TextBox id="TextBox1" runat="server"></asp:TextBox>
As you can see, everything is identical except for the additional AJAX properties. Coding wise, all methods are identical between the two.
Finally, I found the easiest one - Anthem. Why I like it? Well, to use it just download the source code, compile it and then use the assembly generated - it comes with VS2003 version and VS2005 version.
When in VS2003, just create a new tab in the Toolbox and then click Add Items.
Once you browse and select the anthem.dll, you will get to choose which control to add to the Toolbox:
The control list is as follows (see it looks identical to the default controls that comes with the Framework):
After you have set up the Toolbox, you can drag and drop in to your Webform as you would with a normal webcontrol. All the attributes found in the Webcontrol is also available in the Anthem control. There are some additional attributes such as
- AutoUpdateAfterCallBack
- AutoCallBack
- EnableCallBack
- EnabledDuringCallBack
- PostCallBackFunction
Next look at the control comparison:
Anthem Label
<anthem:Label id="antLabel" runat="server" AutoUpdateAfterCallBack="True"></anthem:Label>
Webcontrol Label:
<asp:Label id="lblMsg" runat="server"></asp:Label>
Anthem TextBox:
<anthem:TextBox id="TextBox2" runat="server" AutoUpdateAfterCallBack="True"></anthem:TextBox>
Webcontrol
<asp:TextBox id="TextBox1" runat="server"></asp:TextBox>
As you can see, everything is identical except for the additional AJAX properties. Coding wise, all methods are identical between the two.
Friday, July 4, 2008
Thursday, July 3, 2008
SQL Developer Revisited
I just found out yesterday that a new version of SQL Developer has just been released. Since I used it heavily, I thought I will share some insights on why I like the product so much.
The new version is 1.5. The following is the release history:
The one I just download is 1.5.1. The product has undergone improvement and changes. Between 1.1 and 1.2, Oracle introduced support to MS Access, MySQL and SQLServer. I have not tried this feature since I don't use any of the other databases.
Yesterday, I tried to open the package, function and procedure using Version 1.1 on a 9.2 database and encountered a strange error of "Ora-00942 Table not found". I thought, it was a problem with my rights but turn out that it was a problem with SQL Developer - needed to use 1.2. I found my old downloaded copy and then later checked and found a new version of SQLDeveloper from Oracle's Website.
You can also find a tutorial (using SQLDeveloper 1.2) here.
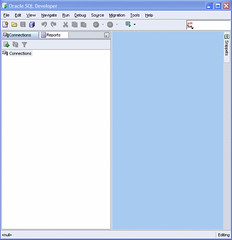
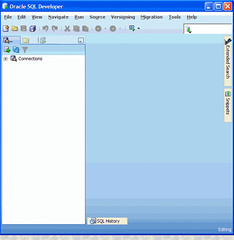
Some interface changes between 1.2 and 1.5
Things I like about SQLDeveloper:
When browsing the table:
The new version is 1.5. The following is the release history:
Releases | Initial release: SQL Developer 1.0 (March 2006) |
Release SQL Developer 1.1 (Dec 2006) | |
Release SQL Developer 1.2 (June 2007) | |
Release SQL Developer 1.2.1 (Aug 2007) | |
Release SQL Developer 1.5 (April 2008) |
The one I just download is 1.5.1. The product has undergone improvement and changes. Between 1.1 and 1.2, Oracle introduced support to MS Access, MySQL and SQLServer. I have not tried this feature since I don't use any of the other databases.
Yesterday, I tried to open the package, function and procedure using Version 1.1 on a 9.2 database and encountered a strange error of "Ora-00942 Table not found". I thought, it was a problem with my rights but turn out that it was a problem with SQL Developer - needed to use 1.2. I found my old downloaded copy and then later checked and found a new version of SQLDeveloper from Oracle's Website.
You can also find a tutorial (using SQLDeveloper 1.2) here.
Some interface changes between 1.2 and 1.5
Version 1.2 | Version 1.5 Look has changed to slightly and some additional options added to the menu. |
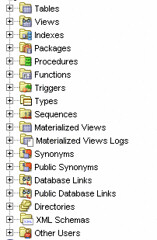
Additional objects like Queues, Java has been added. |
Things I like about SQLDeveloper:
When browsing the table:
- It is easy to edit the data in the table, when you create a new row in the table, you can highlight multiple columns from an existing table and just paste it into the new row. When you browse the table.
- Just type in the condition to filter the rows.
- Right click on the table to analyze.
- View the indexes, partitions and also view the DML needed to recreate the table and all supporting objects.
- Auto formatting on the sql statement. In 1.5, they have further enhanced this feature.
- After you query the data, you can just click on the column header to sort the output (don't have to requery); you can also drag and drop to rearrange the columns.
- When exporting the result to excel, the SQL Script is saved in one of the worksheet in the workbook.
- When you highlight the table name and press F4, you will be given the window equivalent to browsing the table.
- Ability to import and export data from Excel, CSV and other types of files.
- Easily change the structure of your table (gui interface to do that).
- Simplify the editing, checking and compiling of stored procedures, functions and packages.
- Can export the package and package body with one click to a file (for backup and storing into Source Safe or CSV.
- Explain plan (but only if you have the needed tables created).
- Analyze and verify tables with one click.
- Recompile invalid objects with one click.
- Create connection to databases without installing Oracle client (i.e. setting up SQLNet).
- Don't need to install, just unzip the zip file and start using. (comes with two type of packages - one with java bundled another without). As you have guessed, it a Java application.
- Easily configurable parameters.
- Provides third party add on and also allows for auto update (until a major release).
- Best of all it is Free!
Wednesday, July 2, 2008
IIS Application Pool - don't mix your framework
In IIS, we can convert each virtual folder into an Application Folder. We can then configure the Application to run a specific version of the .Net Framework.
When IIS 6 was introduced with Windows 2003, Application Pools were also introduced to improved the stability of IIS. You can then group applications into an Application pool. So you can dedicate application pool for critical application or group them accordingly.
This week, I found there is one thing that should be considered when grouping these applications. Make sure that all the applications grouped under the same application pool is running on the same Framework version. I found out the hardware, when we upgraded one of the application to Framework 2.0 which support multilingual feature in asp.net.
However, after that we found that we kept hitting error "Application Not Available" and had to restart the application pool to get the application back. It happens intermittently between the Framework 2.0 application and the Framework 1.1 application.
I suspect it is caused by the cache in the worker process.
Tuesday, July 1, 2008
Migrating scheduled Task
In one of my previous articles, I discussed Application Scheduling using Windows Scheduler. When it comes time to migrate to a new server or to upgrade to another version of the OS, it can be a pain to recreate all the scheduled task.
The quickest way to do that is to go to the command prompt and then change folder to
c:\windows\tasks
(assuming you installed windows to c:\windows) and then copy all the .job files out to another folder. You can copy this to any folder or even your pen drive. You can then go to the new server and copy over all these files to the c:\windows\tasks folder of the new server. Assuming the new server has the same folder structure, username and password, and you have copied/installed all the required files/programs over to the new server, you just need to right click and then enable all those jobs.
Be careful with the .job files though since it contains the username and password setting in it. I am not sure if you can get the password from it.
Subscribe to:
Posts (Atom)